Program 2 2023-02-01T03:59:15+00:00

Do each exercise: 

10 times and for 3 sets (10 x 3). 
Rest for 2 minutes after each 10.
3 times each week.

On the leg that’s the most painful when you start the program. If you have time, do the exercises on both legs.

Make sure the exercises suit your strength and ability.
Follow the Tailor each exercise steps below.

Each week, record your exercise sessions in the My Exercise Messages app. If you would like to keep a paper record as well, you can use the Program Two logbook template.

Print a copy:

Program TWO logbook
Program TWO exercises

Tailor each exercise:

Week 1:

New Exercises – Do each exercise with no ankle weight.
Exercises from Program One – continue these as you were at the end of Program One

Week 2 – 8: Tailor each exercise to your strength and ability. To get stronger each exercise should feel hard. Follow the instructions below:

How to increase the exercise challenge
When not to increase the exercise challenge

Some exercises are harder than others. The challenge will increase for each exercise at different times.

How to increase the exercise challenge

  • Use the How hard am I working? table to identify how challenging each exercise feels. To view the table click here.

  • In Program Two aim for each exercise to feel VERY HARD. This should feel like 7-8 out of 10 (if 10 is as hard as it could possibly feel). You should feel like you’re pushing yourself a bit.

  • If an exercise feels easier make it harder.
    Each exercise has instructions of how to increase the challenge.

When not to increase the exercise challenge

  • If it’s hard to perform with good technique (good technique = slow and keeping your balance).

  • You’re already exercising VERY HARD (an effort of 7-8 out of 10)

  • You have increased hip pain lasting more than one day after the exercise.

If you experience increased pain

go to My Hip Strength: Managing Exercise Pain.

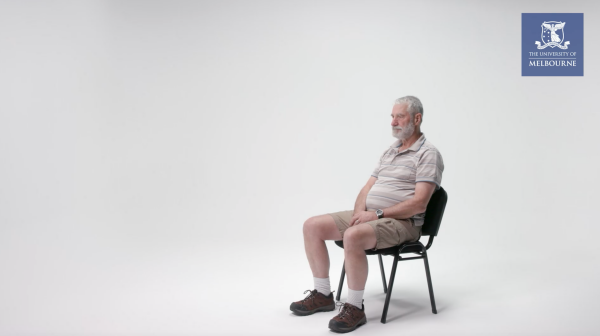
Exercise 1: Sit to stand

Sit on a firm, stable chair. Place the chair back against a wall for support if needed. Place your feet shoulder width apart. 

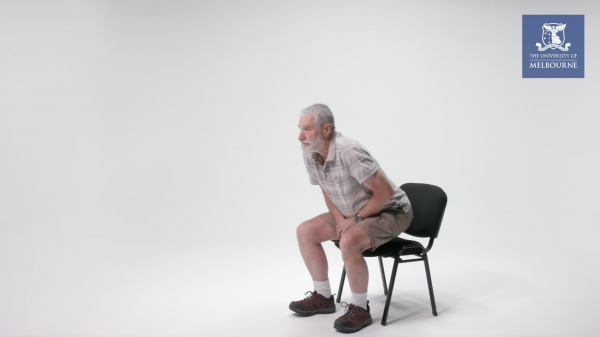
Slowly stand with your hands crossed over your shoulders, or resting on your lap.

Start by leaning forward bringing your nose over your toes.

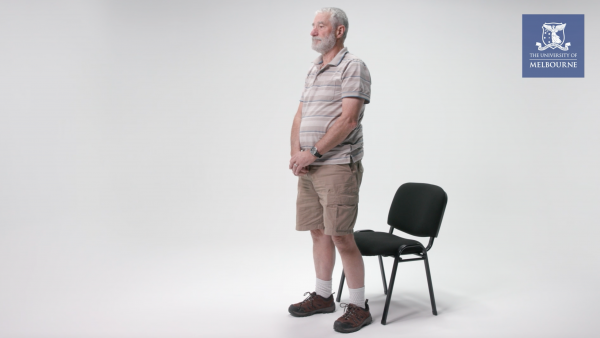
As you lift up from the chair, push through the heels and straighten your legs until you are standing completely straight.

Sit back down slowly. 

Keep your knees in line with your toes.

Use a higher seat

1. Add a resistance band around your knees. Push your knees out against the resistance band, trying not to let them collapse in during the exercise.

2. Add a halfway hold: Hold for 3 seconds at the halfway point of the exercise while going up and/or down.

3. Use a lower chair

4. Hold a weight during the exercise

If this exercise doesn’t work for you, we recommend you continue Exercise 2: Squat from Program One.

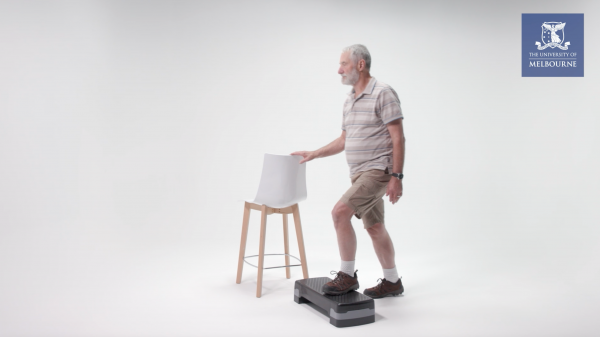
Exercise 2: Step up

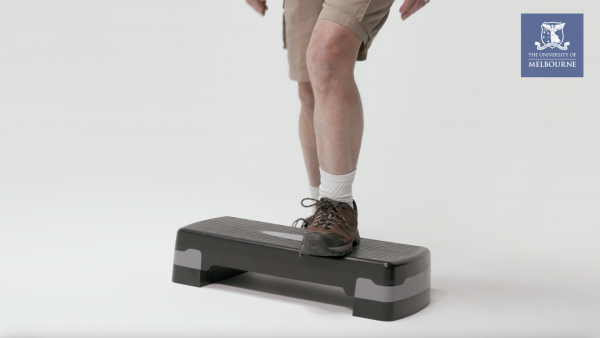
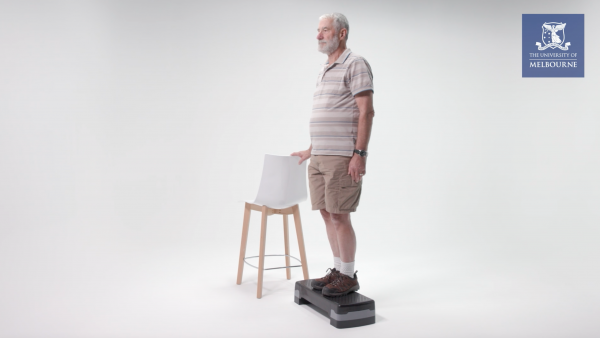
Stand in front of a stair or step.

Stay safe: Use a hand rail or other hand support for balance if required. 

Place your arthritis leg (exercising leg) up onto the step.

When you are stable, push through your heel/ foot and bring up your other leg.

Lightly touch your other leg onto the step, and step it back down slowly to the start position.

Your weight should be on your arthritis leg (exercising leg) throughout the entire exercise.

Throughout the exercise, keep your body weight on the arthritis leg on the step.

Concentrate on keeping your knee positioned over your foot. Don’t let the knee lean in or out.

Use a lower step

  1. Use a higher step
  2. Add weights: Hold weights in your hands while stepping up. Add 1 kg at a time.

If this exercise doesn’t work for you, we recommend you continue Exercise 2: Squat from Program One.

Exercise 3: Standing wall push

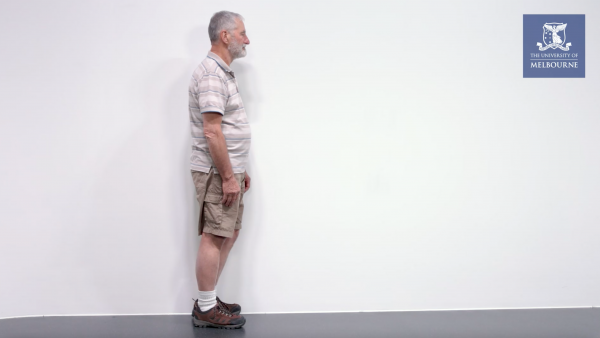
Stand sideways with your non-arthritis leg (non-exercising leg) against a sturdy wall. 

Stand tall.

Lift the non-arthritis leg (non-exercising leg) off the floor so that your hip, thigh and knee are touching the wall.

Keeping your body still, push your non-arthritis leg (non-exercising leg) into the wall, gently.

Hold for 3-5 seconds.

Return your foot to the floor and rest for a few seconds. 

Keep your body still.

Make sure the body part that is gently pushing into the wall is the leg and not your arm or shoulder.

Increase the hold time to 10 or 15 seconds.

If this exercise doesn’t work for you, try the crab walk exercise.

Starting position

Place a resistance band around your thigh/knee level (easier) or around your ankles (harder) so that there is tension when your legs are separated about 10cm.

Slightly bend both knees.

Stay safe: You should stand facing a table, a kitchen bench or a wall that you can reach if you lose balance.

Exercise

Step sideways against the tension of the resistance band, keeping your legs apart.

Do not twist or turn your body and legs. Your feet should point forwards while you are stepping sideways.

Concentrate on keeping your knee positioned over your foot throughout the exercise. Take 3 steps to the left, and then 3 steps to the right.

Continue for 30 seconds to complete 1 round.

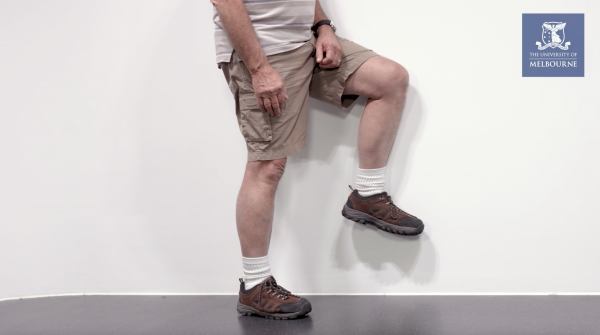
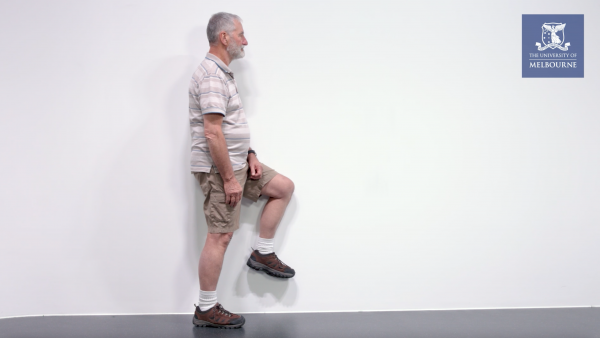
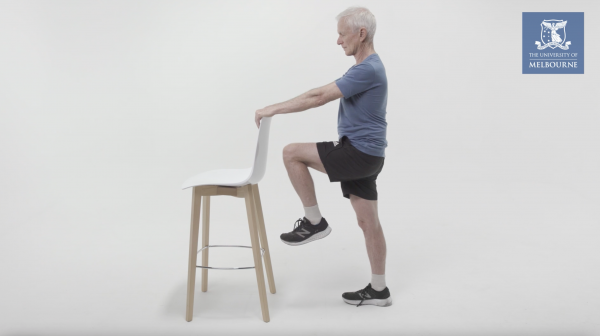
Exercise 4: Standing knee raises (add weight)
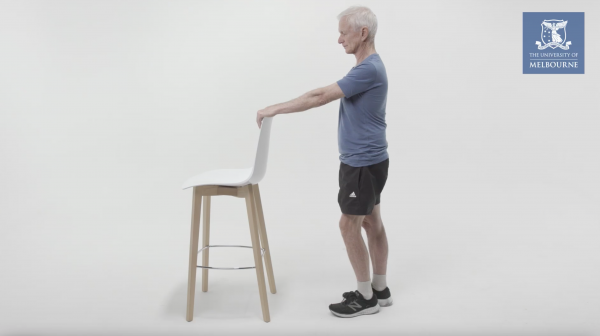
Place a weight on the ankle of your arthritis leg (exercising leg).

Stand tall with your legs shoulder width apart.

Stay safe: Use a chair or table for balance.

Standing tall and strong, bend your arthritis leg (exercising leg) up so that your thigh is parallel to the ground (or lower if discomfort is experienced).

Slowly lower your leg back down. Lightly touch your foot to the ground before repeating straight away.

The aim of this exercise is to progressively build speed, while keeping all the movement at the hip joint. Your body (trunk and pelvis) should not be rocking backwards or forwards during the exercise.

Do the exercise without the ankle weight.

Or try an easier exercise: Crook lying hip bends

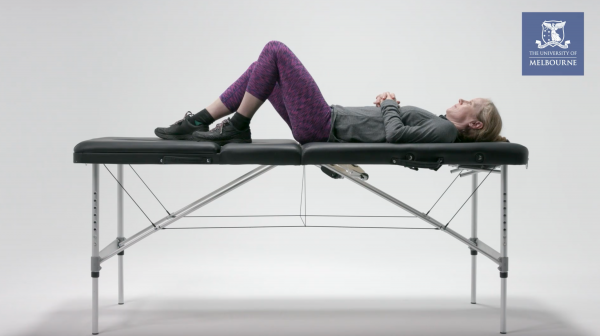
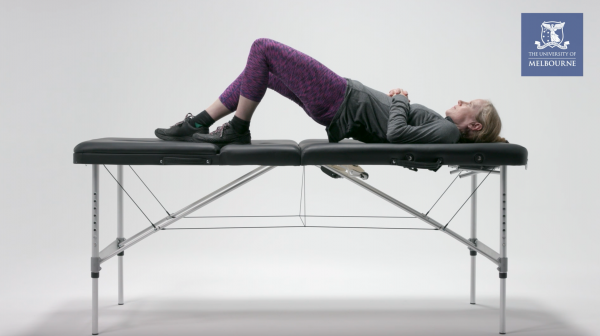
Exercise 5: Split leg bridge

Lie on your back with your knees bent and your feet flat on the floor/firm bed.

Place your feet hip-width apart.

Move your arthritis leg (exercising leg) slightly closer to your bottom and slightly in towards the center. 

Keep your feet in the starting position.

Your arthritis leg (exercising leg) should be closer to your bottom and your non-arthritis leg (non-exercising leg) slightly further away.

Lift your bottom.

Take more weight through your study leg.

Hold for 3 seconds.

Then slowly lower your bottom down to floor/bed. 

Keep your hips level during the exercise.

Don’t use a split leg position and continue with Exercise 5: Bridge from Program One.

Add a weight: hold a weight over your hips/pelvis during the exercise.

If this exercise doesn’t work for you, we recommend you pick an exercise you prefer from one of the three My Hip Exercise programs and do that exercise instead of this one.

Exercise 6: Standing adduction with band
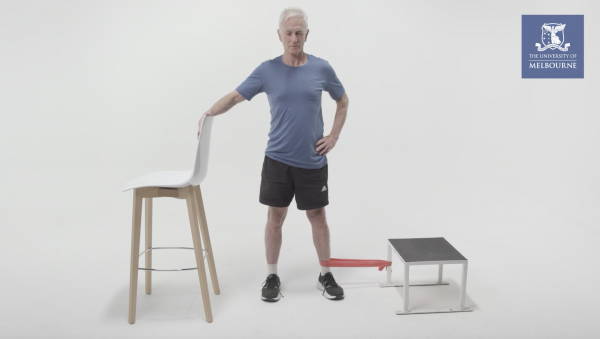
Tie the resistance band to a stable support and loop it around the ankle of your arthritis leg (exercising leg) as shown.

Step away from the support to create some tension in the resistance band.

The non-arthritis leg (non-exercising leg) should stay still during the exercise.

Stand up straight.

Stay safe: use a chair or table for balance as required. 

Standing tall and keeping your belly drawn in, slowly move the leg with the band around it (the exercising leg) to your midline, pulling against the resistance band.

Keep all your body weight supported on your non-arthritis leg (non-exercising leg).

Slowly return your leg to the starting position. 

Keep your body facing forwards (at right angles to the band) throughout the exercise.

Add more resistance: increase the band strength.